Please ensure Javascript is enabled for purposes of website accessibility

Category: Physical Therapy

  • Patellar Instability: My "Kneecap" Goes Out!

    Rehab For Patellar Instability

    Patellar instability can be a debilitating and frankly, a terrifying condition to deal with because you have no idea when or how the patella will “move out of place.”  When it does, it can be painful and crippling.  Patellar instability encompasses a few different scenarios.  Patellar dislocation is when the patella or “kneecap” moves out of place and stays there.  Sometimes a person can move their knee and it will pop back into place and other times, people need the hands of a skilled medical provider to help it reduce.  Patellar subluxation is when the patella slips out but comes back into place immediately.   Still, others can have patellar instability from a shallow trochlear groove (the groove in the thigh bone that the patella sits in) that enables it to move out of place easily, and some have loose soft tissue around the patella which makes it easy to be unstable.  Patellar instability may be a result of multiple dislocation or subluxation events that over time stretches your tissues to the point that they’re like “Silly Putty.”  At SSOR, we understand how to address this conservatively but also how to help you should you need surgery.

    Picture of Normal, Subluxed, and Dislocated Patella
    Picture of Normal, Subluxed, and Dislocated Patella

    What are the symptoms of patellar instability?

    People with patellar instability typically have a history of an injury where the patella “went out of place.” Once that happens, the tissues around the knee get stretched out and therefore make it easy for this to happen.  Symptoms of patellar instability include but are not limited to: aching in the knee or the feeling of the inability to get comfortable, the feeling of “popping” with activities of daily living, pain squatting/going down stairs, and feelings of apprehension when doing functional activities for fear that it will go out of place.  Sometimes people with patellar instability also have systemic hypermobility, whereby they are “loosey goosey” throughout their body.
    Patellar Instability: My "Kneecap" Goes Out! Physical Therapy

    Do I need to have surgery?

    Not necessarily.  You should always try conservative measures first, and that starts with physical therapy.  You should try structured physical therapy and home exercises for at least 6 weeks.  The only time you should consider surgery is if rehab failed (but make sure it’s the right rehab! We’ll talk about that below), or if there is gross instability in that it goes out all the time.  For example, people that still dislocate/sublux rolling over in bed, walking, or sitting on the toilet after physical therapy should consider having surgery to stabilize the knee. There are many different procedures that can be done and these should be explored with your orthopedic surgeon.  Most commonly, people have a medial patellofemoral ligament reconstruction to help restore stability to the patella.

    Will a brace help?

    Bracing can help a little for patellar instability, particularly during activity, but it can’t be the only intervention.  We are not aware of any controlled studies saying that these lead to a better outcome.  You should ask for/get a buttress brace or a patellar stabilization orthosis.  There are many different kinds on the market.  Sometimes, braces serve only to give you peace of mind that you have some compression and support around your knee.
    Patellar Instability: My "Kneecap" Goes Out! Physical Therapy

    Physical Therapy for Patellar Instability

    1.  First and foremost, a thorough physical examination is required to evaluate you for any anatomical or structural abnormalities that may be exacerbating your condition.  Examples might be excessively flat feet, anteroverted or retroverted hips, or lateral positioning of your tibial tuberosity.  All of these basically change the line of pull of the quadriceps in one way or another and enable the patella to slip out.  You should see an orthopedic surgeon to get X-rays and an MRI to determine extent of bony and soft tissue damage.  Ultimately, this will help predict if physical therapy will be helpful or not.
    2. Strengthening of the quadriceps, gluteals, and hamstrings.  All of these muscles provide structural support to the knee. Whether it’s a first time dislocation or you’ve had multiple episodes, your quadriceps are likely atrophied and very weak.
    3. Balance training.  It is imperative that balance training be done on the lower extremities.  Working on balance training helps keep the knee stabilized during functional activities.  It should start on stable, flat surfaces and progress to more unstable ones.  The idea is that when things happen suddenly during our daily lives, the muscles can respond quickly to stabilize the knee and avoid an episode.
    4. Ice massage for pain.  Works wonders, just try it.
    5. Bracing
    6. Activity modification.  Depending on your recreational interests, they may put you at risk for further complications.   Therefore, you may have to modify or adjust your activities until after physical therapy is complete.  That said, many people are able to play their chosen sport after physical therapy and with the use of a brace.  However, you should be evaluated with functional testing measures, like hop testing, to determine physical readiness for sports.  Testing is of particular importance if you desire to play a cutting/pivoting sport.

    If commit to the process of rehab and you’re still having trouble, it’s probably time to go back to your physician and consider surgery.  Fear not, people do quite well following surgery for patellar instability.  Depending on what they have to do in surgery, it may take a little longer to recover fully, but you should be pleased.
    Patellar instability doesn’t have to be a continual problem and the reason for your inactivity.  A structured, comprehensive physical therapy program by a sports physical therapy specialist will help you reduce pain and maximize your function after a thorough exam by an orthopedic surgeon.  The experts at SSOR welcome the opportunity to serve you and it would be a privilege to partner with you in your care.

  • Pre-Operative Exercises for Knee Surgery

    Should You Do Pre-Operative Rehab Before Knee Surgery?

    We see many people before knee surgery for what we like to call “prehab,” or rehab exercises to prepare you for surgery.  There is evidence to support better outcomes in those that do physical therapy and/or exercises before knee surgeries like ACL reconstruction or total knee replacement.  Improving range of motion and increasing strength of the quadriceps and supporting hip muscles has been shown to help hasten recovery of both gait and function.  Unfortunately for many of our patients, they have limited insurance visits.  Therefore, we want to maximize the amount of time we can keep them and supervise their progress and assist them in return to activities.  As a result, we often only see people for a visit or two prior to surgery to show them a home program to do until surgery.  So what should we do about pre-operative exercises before knee surgery?
    In the case of ACL reconstructions, a  classic 1995 study by Cosgarea et al in the American Journal of Sports Medicine tells us that basically 4 things should be achieved prior to having an ACL reconstruction.  There are other papers supporting pre-operative exercises here, and here, and one paper shows that it predicts function up to two years later.  The pre-operative exercises should achieve the following goals:

    1.  Minimal to no swelling.  You have to get the swelling out of there as much as possible.  The swelling is the principal reason why you should wait to have surgery – the knee is already “angry” from the injury and to make it more angry by operating can cause more pain and possibly more dysfunction from stiffness post-operatively.  Depending on the severity of the injury, there may be a point where you’ve maximized how much you’ll actually get out of it.  Ice, as much rest as possible, elevation, and compression are all ways to reduce swelling.
    2. Get at least 120° of knee flexion.  It’s hard to know for sure how much this actually is unless a physical therapist measures you, but basically get as much bending as possible.  Research has shown that if you achieve 120° of knee flexion pre-op, your risk of knee stiffness, known as arthrofibrosis, is much less.  Riding an exercise bike, deep water jogging in the pool, or heel slides (Figure 1) are all good ways to do this.
    3. Get your leg as straight as possible.  Much like knee bending, you want your knee to be as straight as possible.  If you have a meniscus tear or an ACL tear, the tear may restrict this and extension could be very very painful.  Do the best you can to get it straight.  Heel hangs are a great way to do this (Figure 2).
    4. Maximize your quadriceps function by being able to do a straight leg raise.  A straight leg raise (Figure 3) is a fundamental exercise post-op because if you can do it, you’ll be able to walk without a brace and you have “minimum” quad function.  You have to be picky with this though – it can’t be a “bent knee raise.”  We’re really particular about this exercise at SSOR, so check with us if you aren’t sure.  If you try and do one and can’t keep your knee straight, quad sets (Figure 4) are a good place to start. Roll a towel up and place it under your knee and just push the back of your knee into the towel roll.  A physical therapist can also put you on a muscle stimulator to help facilitate this.

    Pre-Operative Exercises before Total Knee Replacement

    Truthfully, the above are great guidelines for any knee surgery.   In the case of exercises before total knee replacement surgery, the evidence supports doing pre-operative exercises for those having a total knee replacement.  As this systematic review shows, pre-operative exercises may also reduce costs and length of hospital stay. However, there is evidence saying pre-operative exercises are not effective, but in our experience, improved motion and strength prior to surgery leaves you with a better starting point after your total knee replacement.   In addition to the goals stated above for pre-operative ACL surgery, other exercises may include hip strengthening, stretching, and balance activities.  The three main issues long-term after total knee replacement are declining quadriceps strength, loss of motion, and decreasing balance.  Those three items are heavily emphasized at SSOR both pre- and post-op to maximize function.
    If you’re on track to have ACL reconstruction or a total knee replacement, it would be a privilege to partner with you in your care.  Give us a call if you need exercises before knee surgery to help maximize your outcome post-operatively and put yourself in the best position to succeed.  We have locations in Overland Park and Prairie Village to serve you.

    Pre-Operative Exercises for Knee Surgery Physical Therapy
    Figure 1: Heel slides with sheet for range of motion


    Pre-Operative Exercises for Knee Surgery Physical Therapy
    Figure 2: Heel Hangs


    Pre-Operative Exercises for Knee Surgery Physical Therapy
    Figure 3: Straight Leg Raise


    Pre-Operative Exercises for Knee Surgery Physical Therapy
    Figure 4: Quadriceps setting exercise
  • 6 Winning Super Bowl Snack Ideas

    6 Winning Super Bowl Snack Ideas

    The big game doesn’t have to derail your healthy eating plan.

    Claimed to be the second largest eating extravaganza next to Thanksgiving, the Super Bowl is infamous for indulgent fare such as pizza, fried hot wings, chips, rich dips, sugary sodas and beer. As with any food-centric celebration, it’s wise to have a game plan of what you’ll eat, especially if you’re watching your weight or managing a health condition.

    “If you’re hosting a Super Bowl party, provide a variety of options, including some choices that are lower in calories since people will be sitting around for about four hours grazing but doing very little activity except cheering for their favorite team,” says Jeanne P. Goldberg, PhD, a professor at Tufts’ Friedman School and director of the Nutrition Communication Program. “It can help to offer food in small portions and plan a progression of food offerings [perhaps starting with lighter items], instead of putting out everything at once.” This also ensures perishable food doesn’t sit out too long – no more than two hours. Not sure what to serve or bring to a party? Goldberg suggests:

    1. Crunch smarter.

    Offer popcorn, a whole-grain food. Spritz air-popped kernels with garlic-infused olive oil, then toss with grated Parmesan cheese and sprinkle with black pepper. Or, serve pistachios in the shell to slow eating.

    2. Offer lite dips.

    Swap a sour cream dip, which offers little nutrition, with a dip made from low-fat plain Greek yogurt, chopped garlic, minced green onions and herbs, such as dill. Pair with fresh veggies.

    3. Impress with stuffed mushrooms.

    Make stuffing by sautéing chopped onions, mushroom stems and garlic in olive oil with seasonings such as thyme and oregano, then add dried whole-wheat bread crumbs. Use the mixture to fill white mushroom caps. Top with grated Parmesan or mozzarella cheese and bake at 400 degrees Fahrenheit about 15 minutes.

    4. Swap kabobs for wings.

    Cut skinned chicken thighs or breasts into small chunks and marinate 2 hours, such as in reduced-sodium teriyaki sauce. Put chicken on short wooden skewers (presoak and wrap ends with foil to prevent burning) and broil until cooked through, about 10 to 15 minutes, turning once or twice.

    5. Treat with fruit.

    Puree berries (fresh or frozen, slightly defrosted) in a blender, then swirl into plain Greek yogurt. Offer it as a dip for fresh fruit, such as bite-size pieces of pineapple, apples and kiwi.

    6. Provide a choice of beverages.

    Although many guests will expect to see soda and beer, people can pace themselves if there are other options, such as bottles of unsweetened carbonated or sparkling water infused with fruit flavors.

    Before the big game, get out and be active. Go for a walk, jog, bike ride. Make sure to eat a healthy breakfast and eat a protein rich snack before you go to the party. This, and consistent consumption of water will help you to not be so tempted to eat unhealthy later on.

    Have a great Super Bowl weekend!

  • Elbow Pain: Are you sure it’s the elbow?

    Neck Pain as the source of Elbow Pain

    Does this sound like you?  You might be male or female.  You’re probably age 40 or greater.  Probably have a job where you sit at a computer all day.  At the end of the day, you have aches and pains in your neck and shoulder possibly, or just that bloody elbow pain that tends to be achy.  When you’re not sitting for prolonged periods, you usually feel OK.  Maybe repetitive movements start to bother your elbow, but you notice it way more often in the car, the airplane, or at the desk.   As it progresses, you feel it more constantly and the pain becomes more intense.

    The physical therapists at SSOR are astute at evaluating the true source of our patient’s pain and dysfunction.  One thing that is not only diagnosed incorrectly but also treated inappropriately is elbow pain.  Many patients come in here with one or both elbows hurting and of course, they’re labeled with either tennis elbow or golfer’s elbow.  Maybe they’ve been to physical therapy elsewhere where they got the “cookie cutter” physical therapy – stretching, some exercises, ice, heat, bracing, etc.  Little to no improvements are realized.  Patients go back to the doctor and get more medications, get injections, and still, little relief.  Patients begin to get frustrated and think “am I crazy?”  Sadly, this happens regularly.  So how do you know?
    Many times, elbow pain, regardless of it is medial or lateral, often comes from the neck.  The cervical spine has been implicated as a source of elbow pain in studies here, here, and here just to name a few .  An X-ray would show that you may have some arthritic changes in the neck, but a competent physical therapist (just like the PT’s at SSOR!) will pick this up.  Clearly, our competitors are not because we’re seeing people come here at the recommendation of others because they’re just not getting better elsewhere!

    Achy Elbow Pain – What’s Causing It?

    Elbow pain from the elbow – may be point tender or have general achiness around the elbow, but usally nowhere else.  Pain with specific activities – gripping coffee cups, lifting purses or briefcases, grabbing door handles, achiness from typing, or if you’re a golfer, along the inside of the elbow with golfing.
    Elbow pain from the neck – typically achy, might be intermittent or constant. May have pain that radiates from the neck and shoulders down to the elbow.  May have associated numbness or tingling from the elbow to the hand.  Not a typical pattern, but you tend to be worse in prolonged positions.  The end of the work day is usually the worst.  You tend to feel best in the morning.  You should also be highly suspicious of neck being the source if BOTH elbows hurt.  Nobody gets bilateral tennis elbow (exception being maybe motorcyclists who have to grip handlebars with both hands!).  Be on alert for this!  Rare to have the same problem on both sides and have the elbows be the source.

    How do you treat elbow pain from the neck?

    After we determine it’s the neck, we’ll do things like postural exercises, stretching of the front shoulder, spinal mobility, strengthening of the back muscles, and specific manual therapy techniques to improve soft tissue and nerve mobility.  Amazingly, our approach gets people’s elbow pain better – often without ever touching the elbow.  Numerous studies here, here, here, here, and here have all shown treating the neck helps with elbow pain.
    We put ourselves out there – we tell our patients that they should expect results quickly.  If we’re right about our evaluation finding the neck as the source, you’ll be markedly better within a couple of weeks.  You should expect this from good physical therapy.  You should see positive trends quickly and not go endlessly for months on end with no end in sight, regardless of your condition.  This approach is wasteful of both your time and money.
    It would be a privilege to serve you and partner with you in your care.  Remember, you can see a physical therapist in Kansas without a physician referral.  Give us a call – we’re confident we can help you!  We have physical therapy locations to serve you in Prairie Village and Overland Park.

  • Driving after ACL Surgery

    When is it OK to Drive After Knee Surgery?

    The physical therapists at SSOR see lots of people that have had knee surgeries.  One of the first things they’re concerned about, even before walking, is when they can drive again.  Being able to drive and come/go as we please is one freedom that people take for granted and have a really hard time giving up!  Plus, no one like to be a burden to friends and family having to drive them all over.  Unfortunately, the ability to drive lacks objective data, but rather a combination of things.  However, a recent study actually explored reaction time after anterior cruciate ligament (ACL) reconstruction.  So what’s the verdict on driving after ACL surgery?

    General guidelines/considerations with driving after ACL surgery

    We usually tell our patients a few things when they ask.  First, we ask them if they’ve talked about it with their doctor.  That is where the answer should come from.  However, many doctors don’t address it or say “ask your physical therapist.”  If that is the case, we first want to know which limb it is – obviously if it’s your right knee, that’s more of a problem because you use that one to drive primarily.  Next, we want to make sure you have your pain under control, have good motion to move your knee back and forth, and have enough quadriceps strength to be able to push the break if need be.  Third, we want to make sure you aren’t taking pain medication throughout the day.  Pain medication can make you groggy and delay your reaction time.  We prefer our patients only be taking those at night to help them sleep if need be.  Finally, we want to make sure you feel comfortable behind the wheel!  Many people forget about that part – the idea of driving is appealing, but actually getting behind the wheel and driving with your newly fixed knee can be intimidating!

    Study Results

    Singh et al in  Orthop J Sports Med evaluated 27 patients who had ACL reconstructions where evaluated for reaction time and braking time at 7-10 days, 3 weeks, and 6 weeks post-op.  They were compared to a group of normal, healthy controls.  Results of the study were as follows:

    1. Patients with allograft or cadaver grafts regained normal braking times by 3 weeks post-op and they continued to improve.
    2. Patients with hamstring or patellar tendon autograft (their own tissue) were impaired at 3 weeks. At 6 weeks, those with hamstring autograft normalized while those with a patellar tendon autograft continued to demonstrate delays.

    The delay with the patellar tendon grafts is explained in part because the quadriceps are needed to push the brake and the patellar tendon is the distal attachment of the quadriceps, so this makes some sense.  All that said, the physical therapists at SSOR encourage you to talk to your doctor about which graft is best for you.  This study should not be the sole reason that you choose or don’t choose a graft.  Really, the purpose is to show that you might not be as ready as you think you are after knee surgery to drive.  Be careful!   Regardless, the best bet is to talk to your doctor and your physical therapist to find out when you’re OK to get behind the wheel again.
    It would be a privilege to serve you after your knee surgery and partner with you in your care.  (913) 728-8599  We have locations in Prairie Village and Overland Park to serve you.
    Reference:
    Singh et al.  Driving reaction time after right knee ACL reconstruction.  Orthop J Sports Med.  2015; 3(7): Suppl 2.

  • High Ankle Sprain

    Physical Therapy for High Ankle Sprains

    We posted a blog previously about inversion ankle sprains, the more common and usually much less painful ankle sprain.  However, there is another type of ankle sprain, the “high ankle sprain” or otherwise known in sports medicine circles as the “syndesmotic  ankle sprain.”  High ankle sprains account for only about 1-18% of ankle sprains, according to a 2006 Journal of Orthopedic and Sports Physical Therapy study.  They are most common in soccer players, skiers, and American football players.  The objective of this post is to talk about the how’s and why’s of high ankle sprains.  If you or your child suffers a high ankle sprain, the sports physical therapy experts at SSOR are your answer to get you back on your feet.

    What is a high ankle sprain?

    A high ankle sprain is a disruption of the membrane between the tibia and fibula, the bones of the lower leg.  That joint between the two bones with the membrane is called a “syndesmosis.” A good analogy is to think of a wishbone with a sheet of Saran wrap between the two parts of the bone.  A high ankle sprain is a “tear in the Saran wrap.”

    What causes a high ankle sprain?

    Contrary to an inversion ankle sprain that is usually caused by “rolling” the ankle, a high ankle sprain has a few causes.  One is “hyperdorsiflexion,” or forced movement of the foot towards the shin.  Another mechanism is someone landing on the back of your foot while your foot is pointed downward (“plantarflexed”).  There is also typically a rotational component to high ankle sprains.  Therefore, the foot may be externally rotated or the talus, the bone the tibia sits on, gets rotated in the ankle joint.  Basically, all of these causes of injury drive the ankle joint into the “syndesmosis,” which causes the tearing and the pain.

    What are the symptoms of a high ankle sprain?

    Symptoms of a high ankle sprain are similar to an inversion ankle sprain, but there are some differences.  First of all, it hurts more to externally rotate the foot (turn it out) than an inversion ankle sprain.  Additionally, the person is usually a little more tender above the ankle, between the tibia and the fibula.  Squatting and going down stairs are especially painful.  Last, end range dorsiflexion is a little more painful.  Truthfully, it is best to have your ankle examined by an athletic trainer, sports physical therapist, or an orthopedist for an accurate diagnosis.

    How long to recover from a high ankle sprain?

    No question, high ankle sprains take longer to heal than the more common inversion ankle sprain.  The main reason is that daily activities, like squatting and taking stairs, continue to cause separation of the membrane.  Running, jumping, and doing sports activities also cause that to happen.   Therefore, full recovery can take anywhere from 4-12 weeks.

    Rehab for High Ankle Sprain/Exercises for High Ankle Sprain

    Believe it or not, there are some subtle differences in the rehab for a high ankle sprain.  Exercises for a high ankle sprain are relatively similar.  First of all, there is really no agreement in the literature about  what to do immediately following a high ankle sprain – should the person be non-weight bearing, in a walking boot, walk as tolerated with a brace, or some have proposed surgically fixating a screw between the two bones to help the membrane heal.  The main issue is that membrane has to heal back together.  If you do too much walking or squat-like movements, the membrane gets repeatedly insulted and it can’t heal.  At SSOR, we definitely advocate limited weight-bearing and activity modification.  We also suggest a heel lift for the shoe.  The heel lift serves to negate the need for as much ankle dorsiflexion required for things like descending stairs and squatting.  Like any other ankle sprain, mobility, range of motion, strength and balance need to be restored.
    Here’s a summary of what should be done in rehab:

    1. Partial weight bearing with crutches if needed.  Use of walking boot determined by physician.
    2. Heel lift in the shoe.
    3. Range of motion exercises as tolerated.
    4. Minimize squatting, lunging, and descending stairs.  Use the uninvolved leg to descend stairs.
    5. Strengthening of the gluteal muscles (yes, that’s a fact – gluteal deficits are evident almost immediately after an ankle sprain).
    6. Use a pool for gait training and strengthening.
    7. Balance exercises once fully weight-bearing.
    8. Gradual return of strengthening and functional activities.
    9. Patience!!!  Unfortunately, these injuries just require time to heal.  It really stinks because it’s often time that people don’t have!

    The sports medicine experts at SSOR are your first choice for rehabilitation of high ankle sprains.  We have two convenient locations to serve your physical therapy needs, one in Overland Park and one in Prairie Village.  It would be a privilege to serve you and partner with you in your care.  (913) 728-8599

  • Epsom Salt Bath

    Do Epsom Salt Baths Work?

    Oh, the millions of remedies out there promising faster healing, relief from aches and pains, faster recovery, “detoxification,” and the list goes on.  The physical therapists at SSOR are asked on a regular basis – “Is there any benefit of X to help with X?”  One of the ones that we get asked about, or hear patients using, is Epsom salt baths.   Epsom salt baths are used for anything from ankle sprains to helping with the common cold.  Is there anything to it though?

    What is Epsom salt?

    Epsom salt is the common name for magnesium sulfate.  Originally, it came from Epsom, England, reportedly from bitter water that was boiled down.  There seemed to be a trend towards faster healing with this water, and alas, Epsom salt water baths were born.

    What’s are Epsom salt baths used for?

    The FDA has actually improved its internal use as a laxative.  Other than that, the research on Epsom salt baths is scant at best.  There are no studies on Epsom salt baths for athletic injuries, recovery, or treatment of musculoskeletal problems.

    How are Epsom salt baths supposed to work?

    Again, all of these are proposed theories, but there has been zero scientific validation of them.  One theory is that the salts are absorbed through the skin and then they draw toxins out of the body.  While there can certainly be some fluid gradient changes via osmosis (water will diffuse across the skin to the area of higher concentrated solution) in a case of say, an acute ankle injury that causes swelling in the ankle, Epsom salt isn’t necessary for that.  Any salt would work!  So, this is a really weak argument.  Plus, the skin is a pretty good barrier for something like that to occur.  Other proposed theories, via the above mechanism, helps with inflammation and sedation of the nervous system.
    The caveat to this though is that when taken orally – it can be a powerful laxative but you can get some vicious side-effect with it.  Therefore, consult your doctor before doing that.

    The Bottom Line

    There is absolutely zero evidence that Epsom salt baths do anything for musculoskeletal injuries or recovery.  That said, if you think they’re helpful or that they work, go right ahead!  There is certainly the “power of placebo” in matters like these.  We have no problem with it if you want to give them a try!
    The physical therapists at SSOR, now with two locations to serve you in Overland Park and Prairie Village, are committed to helping you get great outcomes and be informed in the process.  It would be a privilege to serve you, give us a call!

  • ACL Knee Brace: Do You Need One?

    ACL Knee Brace: Are They Effective?

    We see lots of athletes at SSOR that have anterior cruciate ligament (ACL) reconstructions.  It’s no secret what an epidemic that ACL injuries are, especially in young female athletes.  It is well-documented that 75% of ACL injuries are non-contact and that young female athletes tear their ACL’s 2-8x more than males do.  Even more troubling is that current data suggest that up to 30% of athletes tear their other ACL or re-tear their reconstructed one within 2 years after surgery!  One question we address with every patient and their family is whether or not they need/should use a knee brace after ACL reconstruction when they return to sport.  Naturally, the PT’s at SSOR look to the research to guide our practice.  So what’s the data show on ACL knee braces?

    Knee Braces: Necessary?

    In a study by Smith et al in 2014 in Knee Surgery Sports Traumatology and Arthroscopy, researchers concluded that biomechanical and clinical evidence suggests current functional bracing technologies do not sufficiently restore normal biomechanics to the ACL-deficient knee, protect the reconstructed ACL, or improve long-term patient outcomes.  In another review, Bodendorfer et al (Phys Sports Med 2013) found that evidence supporting their efficacy in reducing or preventing injury remains limited.  Furthermore, several studies have found that ACL knee braces have little effect on knee stability, re-injury rates, or kinesthetic awareness (fancy term for knowing where your knee is in space) (McDevitt et al, AJSM 2004; Birmingham et al, AJSM 2008; Wright & Fetzer, CORR 2007; Beynnon et al, JOSPT 2002).   Despite all of this data showing that ACL knee braces really don’t do much, a study in 2003 by Decoster and Vailis in Orthopedics found that 87% of orthopedic surgeons prescribe them!
    Trust us, there are even more older studies that effectively find the same thing – ACL knee braces really don’t do much to help prevent injury or re-injury.  Unfortunately, what is not known and what is very difficult to study is what braces do for the mental side of returning to sport – does having a brace make people “feel” better and more confident in their knee?  At this time, we just don’t know that.
    One topic worth debating is which knee should be braced after ACL reconstruction?  While it may seem crazy, think about this – the reason why you have surgery in the first place is to restore stability to the knee where the ACL is torn.  Given the elevated risk of ACL injury to the other knee after injury to one knee, perhaps we should brace the unaffected knee if an athlete is going to wear one?  It’s something worth thinking about.

    The SSOR Philosophy

    In our view, braces are completely a choice between patient and/or parents and the doctor.  Regardless of what we suggest, the physician is in charge and the may want you to wear one.  Some athletes just feel they need them or parents may insist.  That is fine too!  If our opinion is asked, we typically do not recommend braces for a few reasons.  First of all, our patients do not wear their brace in rehab.  We want our patients to develop confidence in their knee without external support.  Sometimes, braces become a “security blanket” and athletes rely on them too much or give them a false sense of security that their knee is OK.  Therefore, if an athlete maybe forgets to pack their brace for a tournament out of town, the lack of the brace may be a mental barrier for them during competitive play.  Secondly, there is some belief that wearing a brace may give an athlete false sense of confidence that they can engage in more risky behaviors because “their brace will take care of them.”  Obviously, that is not true.  Third, athletes sometimes become targets in competitive play if they have a brace on.  Unfortunately, it’s just a reality in sports – there are just some selfish, short-sighted coaches (and sadly, parents!) who encourage their players to go after an athlete or well, just bad sports who target their opponents knee without any prodding.  Sometimes, an ACL knee brace can be a “bullseye” for an athlete with malicious intent.  Finally, as we stated earlier, the evidence just doesn’t support using them and given their cost, the benefit is likely not there.
    All that said, skilled, structured rehabilitation and specific return to play progression helps improve confidence and minimize the risk of re-injury.  We’re confident that the approach we take at SSOR is as thorough, detailed, and specific as one can be.  Rest assured, you’ll be back on the field when you have passed our criteria and have demonstrated that confidence in the knee we talked about.  We know in the long run, this is the best approach to garner the most effective outcome.
    It would be a privilege to serve you or your young athlete after their ACL injury and partner with you in their process of recovery.  (913) 728-8599  We’ve done it for athletes at every level and know what it takes to maximize your functional capabilities.

  • The Biggest Mistake You’re Making With Hamstring Stretching

    Hamstring Stretching Mistake: Do YOU Do This?

    We get asked on a daily basis about proper stretching technique.  We even see bad form at the gym and at health clubs and find it hard to mind our business! We want so bad for people to do things the right way if they’re going to take the time to keep healthy, fit, and flexible.
    Everyone stretches their hamstrings.  We teach this all the time.  However, there is one common mistake we see all the time and we just have to share it with you.
    In figure 1 below, you’ll see the subject’s back is “rounded.”  This is not correct.  Rounding of the back leads to a posterior pelvic tilt which actually shortens the very muscle you are trying to stretch.  Plus, it just puts your back in a compromising position.

    The correct way to stretch is to keep your back straight and lean forward.  We tell our patients to “stand tall like a soldier and bring your nose forward.”  In this position, the bend comes from the hips, not the spine.  The forward lean position keeps your spine in a neutral position and keeps your pelvis back so you can maximally stretch the upper part of the hamstring.

    How long should I hold my hamstring stretch?

    For stretching to be effective, studies have previosly shown that they need to be held for 30 seconds.  Any less isn’t long enough and any more shows no real changes compared to 30 seconds.  So, why do in 60 seconds what you can do in 30?  Just be aware that it will take a few weeks of consistent, daily stretching to get permanent changes in muscle length.
    The physical therapists at SSOR are experts in stretching and exercise.  Give us a call – we can help!  It would be a privilege to serve you and partner with you in your care.

  • "Prehabilitation" Before Knee Surgery

    Exercises Before Knee Surgery

    We see many people before knee surgery for what we like to call “prehab,” or rehab exercises to prepare you for surgery.  It’s interesting how there is a discrepancy even among physicians about whether or not it’s necessary to do prehabilitation before knee surgery.  So what does the data tell us?
    It is fairly clear from the literature that prehabilitation before total knee arthroplasty leads to better outcomes – studies here, here, here, and here support this.  In the case of ACL reconstructions, a 1995 study by Cosgarea et al in the American Journal of Sports Medicine tells us that basically 4 things should be achieved prior to having an ACL reconstruction.  They are:

    1.  Minimal to no swelling.  You have to get the swelling out of there as much as possible.  The swelling is the principal reason why you should wait to have surgery – the knee is already “angry” from the injury and to make it more angry by operating can cause more pain and possibly more dysfunction from stiffness post-operatively.  Depending on the severity of the injury, there may be a point where you’ve maximized how much you’ll actually get out of it.  Ice, as much rest as possible, elevation, and compression are all ways to reduce swelling.
    2. Get at least 120° of knee flexion.  It’s hard to know for sure how much this actually is unless a physical therapist measures you, but basically get as much bending as possible.  Research has shown that if you achieve 120° of knee flexion pre-op, your risk of knee stiffness, known as arthrofibrosis, is much less.  Riding an exercise bike, deep water jogging in the pool, or heel slides (Figure 1) are all good ways to do this.
    3. Get your leg as straight as possible.  Much like knee bending, you want your knee to be as straight as possible.  If you have a meniscus tear or an ACL tear, the tear may restrict this and extension could be very very painful.  Do the best you can to get it straight.  Heel hangs are a great way to do this (Figure 2).
    4. Maximize your quadriceps function by being able to do a straight leg raise.  A straight leg raise (Figure 3) is a fundamental exercise post-op because if you can do it, you’ll be able to walk without a brace and you have “minimum” quad function.  You have to be picky with this though – it can’t be a “bent knee raise.”  We’re really particular about this exercise at SSOR, so check with us if you aren’t sure.  If you try and do one and can’t keep your knee straight, quad sets (Figure 4) are a good place to start. Roll a towel up and place it under your knee and just push the back of your knee into the towel roll.  A physical therapist can also put you on a muscle stimulator to help facilitate this.

    Truthfully, the above are great guidelines for any knee surgery.  In addition to the above, other exercises may include hip strengthening, stretching, and balance activities.  Regarding those having total knee replacement, the three main issues long-term after total knee replacement are declining quadriceps strength, loss of motion, and decreasing balance.  Those three items are heavily emphasized at SSOR both pre- and post-op to maximize function.
    It would be a privilege to serve you and partner with you in your care prior to or after knee surgery. All indications from the research suggest that prehabilitation leads to better outcomes.  Give us a call if you need exercises before knee surgery to help maximize your outcome post-operatively and put yourself in the best position to succeed.

    "Prehabilitation" Before Knee Surgery Physical Therapy
    Figure 1: Heel slides with sheet for range of motion


    "Prehabilitation" Before Knee Surgery Physical Therapy
    Figure 2: Heel Hangs


    "Prehabilitation" Before Knee Surgery Physical Therapy
    Figure 3: Straight Leg Raise


    "Prehabilitation" Before Knee Surgery Physical Therapy
    Figure 4: Quadriceps setting exercise

  • Jump Training with the Vertimax: Any Evidence?

    Jump Training with the Vertimax

    We get asked our opinion a lot by parents and fitness coaches alike about various fads in training or whatever the hottest new training modalities are worth anything.  There’s always something new and shiny promising better strength, power, and performance.  Unfortunately, so many of them have anecdotal support at best and end up being a waste of money and space.  It’s no shock that many of these trends, fads, and devices get their start from a celebrity or an athlete touting its benefits.
    One device that we’re hearing about a lot lately is the Vertimax, a device used for increasing vertical jump by providing “resisted” jump training.  Many parents want it and feel it’s necessary, and some coaches we work with are asking if it’s worth a darn.  Well, like most things at SSOR, we look to the scientific research to guide our thoughts on whatever the question is.  So what’s the story with jump training using the Vertimax?

    We are only aware of about four studies that compared the Vertimax to other more “traditional” training methods.  McClenton et al in the Journal of Strength and Cond Res (2008) took a group of 31 recreationally-trained men and women and put them in one of three groups: a control group, a depth jump group, and a Vertimax group.  They trained twice weekly for 6 weeks.  Volume and intensity were equated among the training groups.  The depth jump group significantly increased their vertical jump while the Vertimax group did not.  It appears from this study, short-term benefits of vertical jump were better with depth jumps instead of Vertimax training.
    Two other studies performed by Rhea et al in the Journal of Strength Cond Res, both in 2008, had different results.  In one study, they used high school athletes and compared a sprint and plyometric group to a sprint, plyometric, and Vertimax group.  They trained for 12 weeks in this study, compared to the 6 week program in the McClenton et al study.  Researchers in this study found that the differences in power output favored the Vertimax group.  The other study was on a group of highly-trained collegiate athletes.  Again, the program took place over 12 weeks and they compared plyometric training to Vertimax training.  Similar to the study on high school athletes, the Vertimax group showed greater power improvement post-intervention.
    The other study in 2009 was performed by Carlson et al in Res Sports Med.  37 intecollegiate athletes were in 1 of 4 training groups: strength training, strength-plyometric, strength-Vertimax  without arms, strength-Vertimax with arms.  Each group completed a 6 week training program.  There were no statistically significant increases in vertical jump between the groups.  Researchers concluded that there was no difference among the 4 training methods.
    So now what?  There are two studies for and two studies against.  Well, the results from the Rhea et al studies may be partially explained by the fact the program was twice the length.  Therefore, it may have taken longer for the neuromuscular adaptations to take place.  Furthermore, the studies showing benefits of Vertimax testing may be due to the fact that there were more trained athletes.  More trained athletes need different stimuli to realize gains than untrained athletes.

    The Bottom Line on the Vertimax

    Based on the research, we suggest proceeding with caution.  The “pros” are that the Vertimax appears to increase power and vertical jump over a longer program and in more trained athletes.  The “con” is that it’s expensive and may not be needed for more “untrained” athletes.  “Trained” athletes DOES NOT mean athletes that practice their sport several hours a week – trained athletes means athletes who have a history of structured strength training and conditioning.  In sum, for younger athletes without a strength or fitness base (i.e. kids who have just been playing the sport and not training in the weight room), the Vertimax isn’t the best idea.  The focus of their training should be on building a strength base and working on landing/jumping technique as so many injuries have been linked to poor jumping and landing mechanics.  Resisted jumping without a proper strength in place will lead to compensatory movements and can actually lead to a decline in performance.    Many young athletes can’t control their own bodyweight let alone an external resistance.  Further, previous studies have shown that doing jump training with any more than 10% bodyweight or sprint training with any more than 20% bodyweight can lead to decreased performance (Saez de Villareal et al, J Strength Cond Res 2012; Bachero-Mena & Gonzalez-Padillo, J Strength Cond Res 2014.
    The physical therapists at SSOR understand the nuances in treating athletes and the desire to get any “edge” over the competition.  However, we also understand the science behind various training modalities and want to ensure that only the most necessary and effective interventions are utilized.  If the need arises, it would be a privilege to serve you or your youngster and partner with you/them in their care. (913) 728-8599

  • Direct Access in Sacramento, CA

    Direct Access in Sacramento, CA

    State Law in California changed allowing direct access.

    State law in California changed in January 2014 allowing for direct access to physical therapy.  This means you can be seen in our clinics by one of our physical therapists and be covered under your qualified health plan without having to first get a referral from your physician.

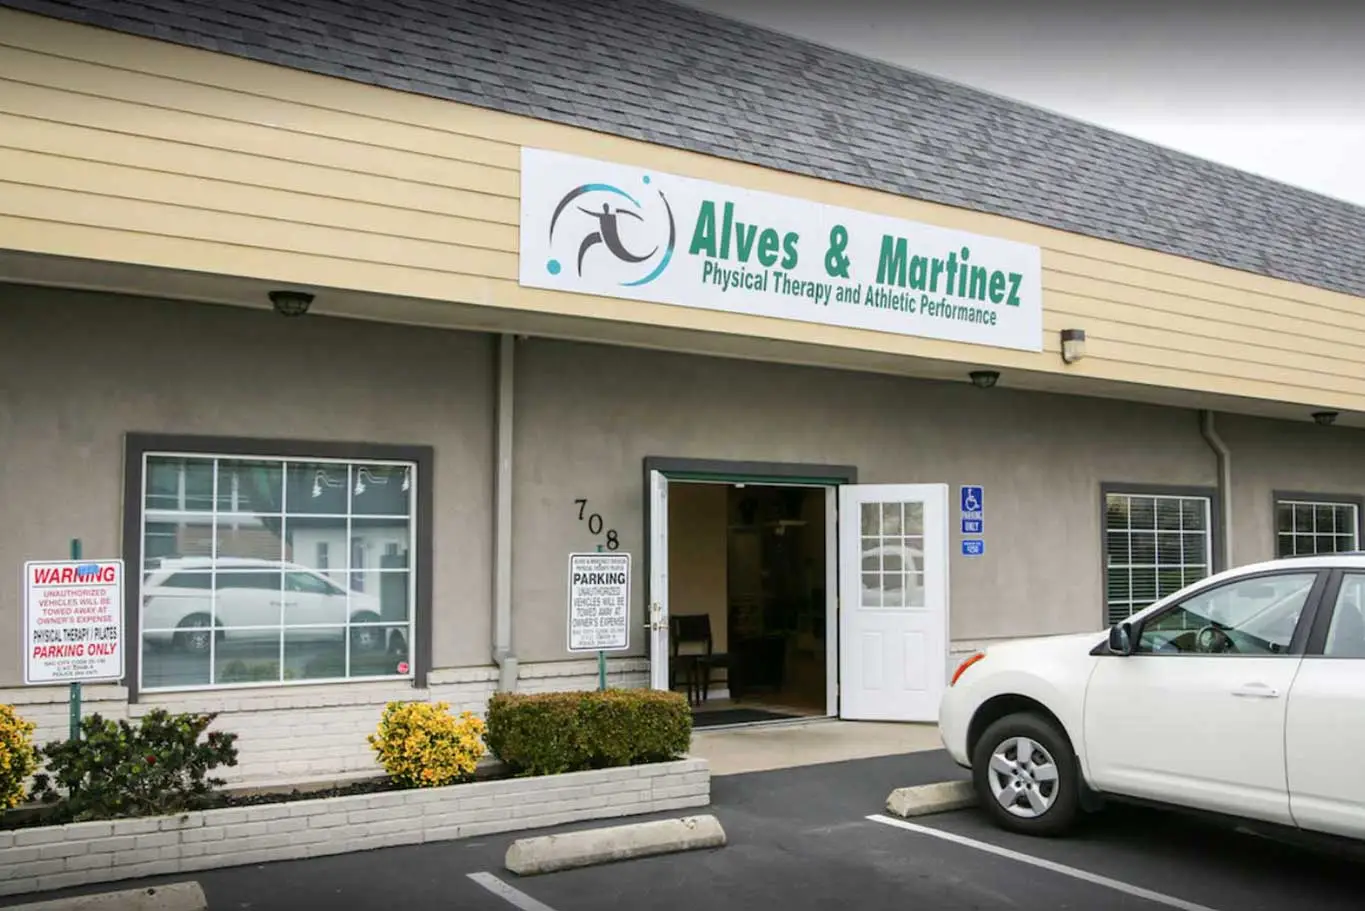
    If you were thinking about coming to Alves & Martinez PT for care of an injury, but do not have a referral, direct access is the answer! Give us a call and schedule an appointment time that is convenient for you and we’ll take care of the rest.

    At your consultation you’ll receive a comprehensive evaluation and communication with your doctor’s office regarding your condition, plan of care and applicable progress notes.  Our coordinated approach allows your providers to work together in fast, safe, effective treatment of you problem.

    Alves & Martinez has 2 locations to serve you, conveniently located in Elk Grove 686-5070 and east Sacramento 457-7427.

    Open Monday through Friday.

    [/fusion_text][/fusion_builder_column][/fusion_builder_row][/fusion_builder_container]

When Was Your Appointment?

We recently changed bill pay providers. Please click the button for the date of your appointment to be directed to the correct online payment portal.